Troubleshooting
Why Did My Loaf Collapse or Deflate?
Bread collapsed in the oven or deflated after baking? Learn the six main causes and how to fix each one, from over-proofing to oven temperature.
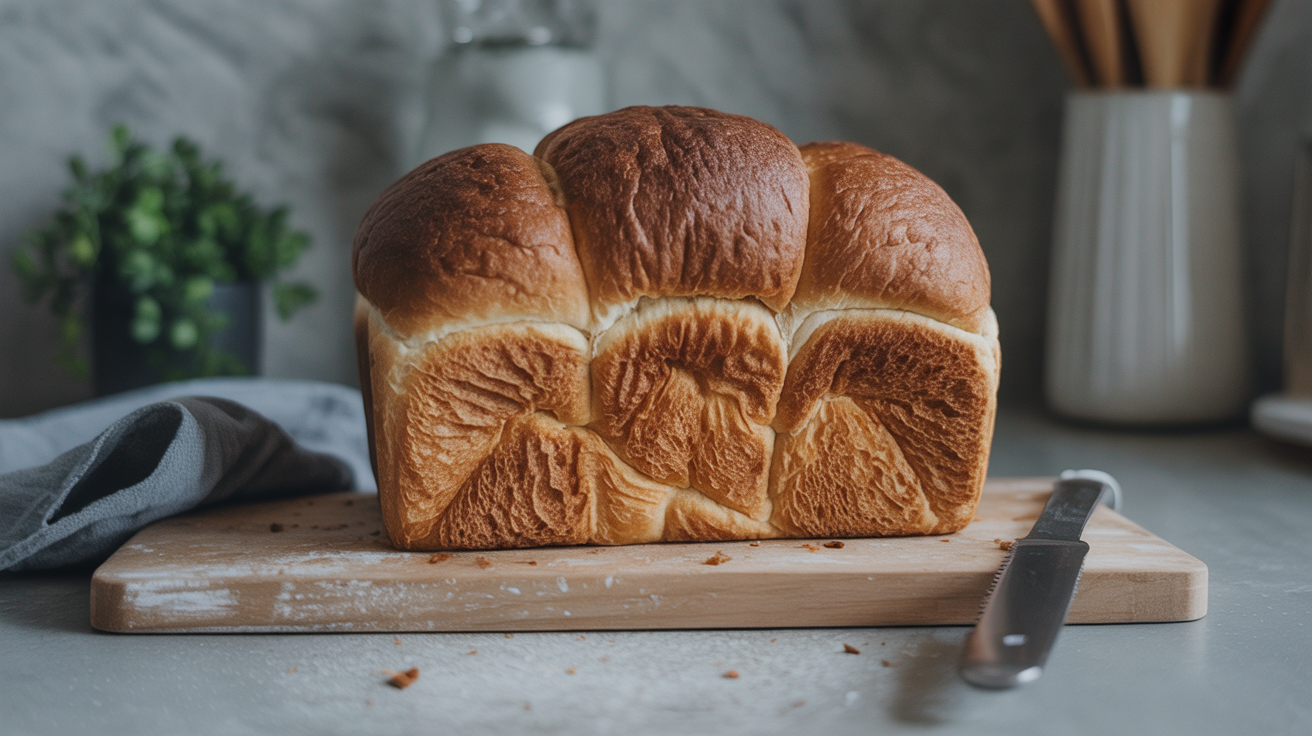
A loaf that sinks in the oven or deflates when you cut it has almost always lost the structural race: it held more gas than its gluten network could support. The cause is almost always one of six things, each with a clear fix.
What Collapse Actually Means
Bread rises because yeast (or wild starter) produces carbon dioxide, and that gas gets trapped inside a web of gluten strands. When the structure holds, you get a tall, open crumb. When it fails, the gas escapes and the loaf drops.
Collapse can happen at three points:
- During the final proof: the dough rises and then visibly falls before it even reaches the oven.
- In the oven: the loaf springs up briefly and then slumps, often within the first 15 minutes.
- After slicing: the crumb looks acceptable fresh from the oven but caves when you cut into it.
Each timing clue points to a different root cause. Knowing when it collapsed tells you where to look first.
Over-Proofing: The Most Common Cause
Over-proofing is responsible for the majority of collapsed loaves. When dough ferments too long, the yeast exhaust the available sugars and the gluten strands weaken under prolonged acid and mechanical stress. The dough literally runs out of the ability to hold itself up.
Signs you over-proofed:
- The dough felt very puffy and jiggly when you scored it.
- It spread wide rather than tall in the oven.
- The crust came out pale and flat, not domed.
- When you poked the surface with a floured finger, the indent did not spring back at all.
The poke test is your best real-time check during the final proof. Press a floured finger about 1 cm into the dough. If the indent springs back quickly and fully, the dough needs more time. If it springs back slowly and about halfway, it is ready. If it stays put entirely, you have likely gone too far.
Fix: Reduce proofing time or temperature. A bulk ferment at 75 F (24 C) for 4 hours is a reasonable starting range for many yeasted doughs. A 78 F (26 C) kitchen might need only 3 hours. For sourdough, cut total fermentation time by 30 to 60 minutes and watch the dough rather than the clock. Retarding the shaped loaf in the fridge overnight (36 to 40 F / 2 to 4 C) slows fermentation and gives you more control over timing.
Structural Causes
Weak or Under-developed Gluten
Gluten is the protein network that gives dough its elasticity and strength. If you under-knead, skip stretch-and-fold sets, or use low-protein flour, that network is too loose to hold the gas produced during fermentation.
Most bread recipes are written for bread flour at 12 to 13% protein. Using all-purpose flour (about 10 to 11%) or a high proportion of whole-grain flours lowers the overall gluten strength. The dough can still rise, but it may not have the structure to stay up under pressure.
Fix: For yeasted doughs, knead until the dough passes the windowpane test: stretch a small piece thin enough to see light through without it tearing. For no-knead and sourdough methods, complete all your stretch-and-fold sets during bulk fermentation. If you are using lower-protein flour and want to keep the recipe otherwise the same, stir in vital wheat gluten at roughly 1 teaspoon per cup of flour to strengthen the network.
Too Much Water for Your Skill Level
Higher-hydration doughs can produce more open, irregular crumbs, which is why recipes in the 75 to 80% range are popular. But a very wet dough has weaker structural integrity. If your shaping technique does not compensate, deflated dough is the predictable result.
As a rough guide: 60 to 65% hydration is forgiving for beginners. 70 to 75% requires confident shaping. Above 80% benefits from a well-seasoned hand and high-protein flour.
If your recipe calls for 75% hydration but your loaves keep collapsing, lower it to 68 to 70% and see whether things improve before changing anything else. You can always work your way back up once the loaves are holding their shape.
Slack or Poor Shaping
Shaping builds surface tension across the outside of the dough. That tension is what holds the loaf in a tall profile as it proofs and bakes. A loosely shaped piece with no surface tension will spread sideways and look flat or collapsed by the time it is done.
Fix: Always pre-shape the dough, let it rest for 15 to 20 minutes (the bench rest), and then final-shape with intention. For a boule, drag the dough toward you across an unfloured bench to create tension on the surface. The dough should feel taut, not slack, when it goes into the banneton or loaf pan. If it tears or sticks rather than sliding, work more quickly and use less flour on the bench.
Oven and Scoring Issues
Cutting Too Late or Too Shallow
Scoring gives the loaf a planned release point for oven spring. If you score too late (the dough is already at the edge of over-proofing) or too shallow (the cuts do not reach the softer interior), the gas has nowhere controlled to go. The result can be a burst seam, a lopsided rise, or a collapsed loaf that could not direct its expansion.
Use a sharp lame or razor blade rather than a serrated knife. Cut at a 30 to 45-degree angle, 1.5 to 2 cm (about 3/4 inch) deep. Do it quickly and decisively, and score as close to loading the oven as possible to avoid the cut surface sealing over.
Oven Temperature Too Low
Bread needs to set its structure before the yeast die from the heat. If your oven runs cool, the crumb stays soft and pliable too long, and the dough can deflate under its own weight before it has enough structure to hold the rise. An under-heated Dutch oven is a common culprit; it should preheat for at least 30 minutes at your target temperature before the loaf goes in.
Most lean bread recipes bake at 450 to 500 F (230 to 260 C). Sandwich loaves with fat and sugar run lower, around 350 to 375 F (175 to 190 C), but enriched ingredients also strengthen the crumb structure.
Use an oven thermometer. Many home ovens read 25 to 50 F (14 to 28 C) hotter than the actual internal temperature.
Quick Cause-and-Fix Reference
| Cause | What You See | Fix |
|---|---|---|
| Over-proofing | Spreads wide, pale crust, poke indent stays | Shorten proof time; use poke test |
| Weak gluten | Tears when stretched, flat dense crumb | Knead to windowpane; use bread flour |
| Too much water | Spreads, hard to shape, no oven spring | Lower hydration 5 to 7% |
| Slack shaping | Wide flat profile, no dome | Build surface tension; bench rest 15 to 20 min |
| Shallow or late scoring | Burst seams, lopsided rise | Score 1.5 to 2 cm deep at 30 to 45-degree angle |
| Oven too cool | Collapses before crumb sets | Preheat Dutch oven 30 min; use oven thermometer |
If your bread comes out looking fine but is sticky and wet inside, that is a separate issue. See why is my bread gummy in the middle for that diagnosis. If the loaf never really rose in the first place rather than rising and falling, dense bread: seven common causes and fixes covers the overlap between the two problems.
Frequently Asked Questions
Why did my bread collapse in the oven after it rose well during proofing?
The most likely cause is over-proofing. The loaf rose during the final proof, but by the time it hit oven heat, the gluten was too weak and the yeast too exhausted to sustain the rise. There may have been a brief burst of oven spring, then the structure gave out. Reduce your final proof time by 20 to 30% on your next bake, and score deeply just before loading.
My sourdough looked perfect going in and then collapsed halfway through baking. What happened?
This is almost always a combination of over-proofing and insufficient surface tension from shaping. Sourdough can move faster than most beginners expect, especially in a warm kitchen above 75 F (24 C). Make sure your poke test shows only a slow, partial spring-back before baking. Also check that you shaped tightly and scored at the correct angle and depth. For a full checklist, see why didn't my bread rise.
Can I save a collapsed loaf after it happens?
You cannot restore the structure once it has failed. But the bread is usually still edible. A flat loaf with a dense crumb makes good toast, croutons, or breadcrumbs. The value of a failed bake is the information it gives you for the next one.
Does cutting bread too soon cause it to collapse?
Slicing a hot loaf causes steam to escape rapidly, and the crumb can become gummy or seem to sink slightly. But a structurally sound loaf will not truly collapse from early slicing. If your loaf caves when you cut it, the structure was already compromised before or during the bake. Let loaves cool at least 45 minutes for small rolls or 1.5 to 2 hours for large boules before slicing.
Does high kitchen humidity cause deflated dough?
High humidity can make the dough surface sticky and affect scoring, but it rarely causes outright collapse on its own. The more practical humidity effect is that flour absorbs ambient moisture over time, which raises the effective hydration of your dough slightly. If you bake in a very humid climate, reduce your water addition by 5 to 10 grams and see whether the dough feels tighter and holds its shape better after shaping.