Yeasted Breads
A Same-Day White Bread Loaf You Can Bake This Afternoon
A beginner-friendly easy white bread recipe using instant yeast. Mix it after lunch, bake it before dinner. Full gram weights, baker's percentages, and step-...
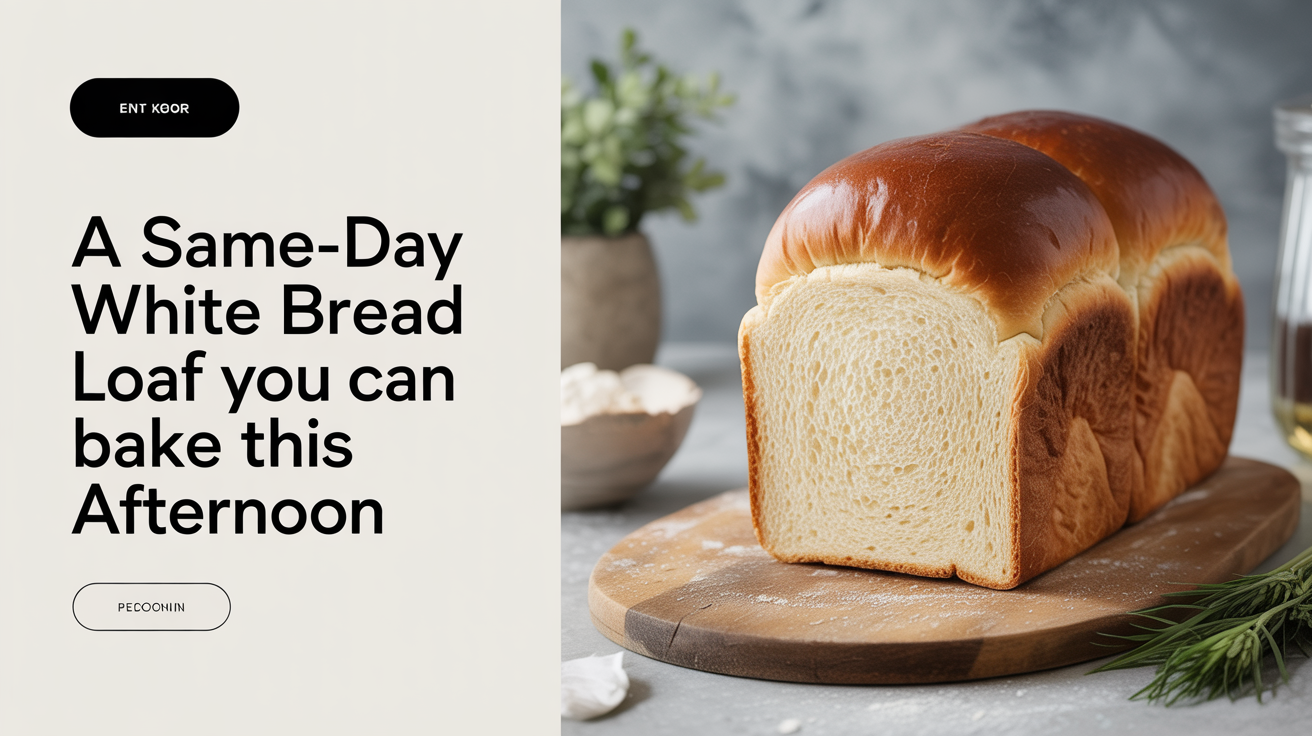
You can have a warm, sliceable loaf of white bread on the counter in about four hours, start to finish, with nothing more than a bowl, a loaf pan, and a few pantry staples.
This guide walks through a straightforward same-day recipe built around instant yeast. There is no overnight fermentation, no preferment, and no complicated shaping. If you can stir and fold dough, you can make this bread.
Ingredients and Baker's Percentages
Baker's percentages express every ingredient as a share of the total flour weight. Flour is always 100%, and everything else is a ratio of that number. It is a useful habit to learn because it lets you scale the recipe up or down without recalculating from scratch.
This recipe targets a 62% hydration, which produces a soft crumb without being sticky or hard to handle for beginners.
| Ingredient | Grams | Approx. Cups/tsp | Baker's % |
|---|---|---|---|
| Bread flour (or all-purpose) | 450 g | 3 1/2 cups | 100% |
| Water, warm (about 38°C / 100°F) | 280 g | 1 1/4 cups | 62% |
| Instant yeast | 5 g | 1 1/2 tsp | 1.1% |
| Fine salt | 9 g | 1 1/2 tsp | 2% |
| Granulated sugar | 9 g | 2 tsp | 2% |
| Neutral oil or melted butter | 18 g | 4 tsp | 4% |
A few notes on these numbers:
Bread flour gives you a slightly chewier, better-structured crumb because it has more protein than all-purpose. Either works in this recipe. If you use all-purpose, the dough will feel slightly softer and the rise may be a little more modest.
The water temperature matters. Too cold and the yeast moves slowly. Too hot (above 49°C / 120°F) and you can damage it. Warm tap water that feels comfortable on your wrist is about right.
The oil or butter tenderizes the crumb and helps the crust stay soft, which makes this loaf good for sandwiches. If you want a crustier exterior, leave it out.
Mixing and the First Rise
Step 1 -- Combine dry ingredients. In a large bowl, whisk together the flour, instant yeast, salt, and sugar. Because instant yeast does not need to be activated in water first, you can add it directly to the flour.
Step 2 -- Add wet ingredients. Pour the warm water and oil into the bowl. Stir with a sturdy spoon or spatula until no dry flour remains. The dough will look rough and shaggy at this point. That is expected.
Step 3 -- Knead the dough. Turn the dough out onto a lightly floured surface and knead by hand for 8 to 10 minutes. You are working to develop gluten, the protein network that gives the bread its structure. The dough is ready when it feels smooth and springs back when you poke it. If it tears instead of stretching, keep going.
If you have a stand mixer with a dough hook, mix on medium speed for 6 to 8 minutes instead. The result is the same.
A windowpane test is a good checkpoint: stretch a small piece of dough thin enough to see light through without it tearing. If it tears, knead for another two minutes and test again.
Step 4 -- First rise (bulk fermentation). Shape the dough into a ball, place it in a lightly oiled bowl, and cover with plastic wrap or a damp towel. Let it rise at room temperature until roughly doubled in size.
With instant yeast and a warm kitchen (around 24°C / 75°F), this usually takes 60 to 90 minutes. A cooler room will take longer. A quick way to speed things up: turn your oven on its lowest setting for two minutes, turn it off, and place the covered bowl inside. The residual warmth makes a good proofing environment.
Shaping and the Second Proof
Step 5 -- Prepare your pan. Lightly grease a standard 9x5-inch (23x13 cm) loaf pan with butter or oil.
Step 6 -- Degas and shape. Tip the risen dough onto a lightly floured surface. Press it gently into a rough rectangle with your fingertips, about as wide as your loaf pan. Roll it up snugly from one short end, sealing the seam by pressing it against the dough as you roll. Pinch the seam and the ends shut, then place the dough seam-side down in the pan. The dough should fit the pan fairly closely but not fill it to the rim.
Step 7 -- Final proof. Cover the pan loosely and let the dough rise again until it crowns about 2.5 cm (1 inch) above the rim of the pan. This second rise, called the final proof, usually takes 45 to 60 minutes at room temperature.
Do not rush this step. An underproofed loaf will be dense with a tight crumb and may crack dramatically along the sides during baking. An overproofed loaf will be loose and may collapse. The right time to bake is when the dough looks puffy and moves slowly when you nudge the pan.
About 15 minutes before the dough is ready, preheat your oven to 190°C (375°F).
Baking and Cooling
Step 8 -- Bake. Place the pan on the middle rack. Bake for 30 to 35 minutes, rotating the pan halfway through if your oven runs unevenly. The loaf is done when the crust is deep golden brown and the internal temperature reads 93°C to 96°C (200°F to 205°F) on an instant-read thermometer.
If you do not have a thermometer, tip the loaf out of the pan and tap the bottom. A hollow sound is a reasonable indicator that the center is baked through. If it sounds dense, put it back in the pan for another 5 minutes.
Step 9 -- Cool before slicing. This is the step most beginners skip and immediately regret. Transfer the loaf to a wire rack and leave it for at least one hour before cutting. The interior continues cooking from residual heat during this time, and the crumb is still setting. Slice too early and you will get a gummy, doughy interior even though the outside looks fine.
The loaf keeps well wrapped at room temperature for two to three days. For longer storage, slice it and freeze in a zip-top bag.
Once you are comfortable with this loaf, a natural next step is building toward a softer sandwich-style crumb. The process is similar but with a higher enrichment and a slightly different shaping technique, covered in how to make soft sandwich bread at home. If you want to branch out into smaller individual rolls using the same dough logic, easy homemade dinner rolls for beginners walks through portioning and shaping. And when you feel ready to leave the loaf pan behind, how to make focaccia, a foolproof beginner's recipe is a good bridge into free-form shaping.
Frequently Asked Questions
Can I use active dry yeast instead of instant yeast?
Yes, but the process changes slightly. Active dry yeast needs to be proofed first. Dissolve it in the warm water with the sugar and let it sit for 5 to 10 minutes until foamy before adding it to the flour. Use the same amount by weight (5 g). Expect the rise times to be a little longer.
My dough feels sticky. What should I do?
A light stickiness is normal. Resist the urge to add a lot of extra flour because that will make the bread denser and tougher. Wet your hands slightly or use a bench scraper to manage the dough during kneading. If it is genuinely very wet and not coming together after a few minutes of kneading, add flour one tablespoon at a time.
The loaf cracked along the sides. What happened?
A split along the sides of the loaf usually means the dough was underproofed during the final proof. The center was still expanding rapidly in the oven heat, and the sides, which set first, could not stretch fast enough. Next time, let the dough rise until it clearly domes above the pan rim and jiggles gently when moved. A score down the center of the loaf before baking also gives the expansion a controlled outlet.
Can I make this dough the night before?
Yes. After kneading, place the dough in an oiled bowl, cover tightly, and refrigerate overnight instead of doing the first rise at room temperature. Cold fermentation slows the yeast and develops a little more flavor. The next day, take the dough out, let it warm up for 30 to 45 minutes, then shape, proof, and bake as written.
Why is my crumb dense even though the loaf rose?
The most common reasons are under-kneading (not enough gluten development), too much extra flour added during mixing, or baking at too low a temperature. Check that the dough passes the windowpane test before the first rise, keep any flour additions minimal, and confirm your oven temperature with a thermometer if you have one. Oven thermostats can read 15 to 20 degrees off from the actual temperature inside.