Getting Started
How to Make Bread by Hand Without Any Special Equipment
No stand mixer, no loaf pan, no banneton. Here's how to make hand kneaded bread with just a bowl, your hands, and an oven.
You don't need a stand mixer, a banneton, a lame, or a Dutch oven to bake a good loaf. Generations of home bakers made bread without any of those things. All you actually need is a bowl large enough to fit your dough with room to spare, your two hands, a flat surface, and an oven. That's the whole list.
This guide walks through exactly how to make bread by hand, from measuring the ingredients to pulling a golden loaf off a sheet pan. If you've never baked before, you might want to start with a complete beginner's walkthrough of your first loaf before coming back here for the equipment-free specifics. If you're already comfortable with the basics, read on.
What You Actually Need (and What to Use Instead)
Most bread equipment solves a specific problem. Once you know what problem each tool solves, you can usually find something in your kitchen that does the same job.
A Large Bowl
You need this, full stop. A salad bowl, a stock pot, a pasta pot. Anything that holds at least 4 quarts works. If your bowl is too small, the dough sticks to the sides and you can't mix it properly.
Something to Measure With
A kitchen scale is the most accurate tool for measuring flour, but measuring cups work fine for a simple white loaf. Bread is more forgiving than pastry. If you're scooping flour with a cup, spoon the flour into the cup and level it off rather than packing it in, or you'll end up with too much.
A Flat Surface for Kneading
Your kitchen counter is perfect. Wipe it clean and dry. A cutting board works if your counter is textured or you'd rather not flour the counter directly. Avoid glass surfaces, which can crack under the pressure of kneading.
A Place to Bake
A loaf pan makes a neat sandwich-bread shape, but it's optional. A heavy sheet pan or a cast iron skillet both work well for a free-form round loaf (called a boule). The bread will spread a little wider and look more rustic, but it will taste the same. If you want it taller, shape it into an oval, which holds its height better than a round.
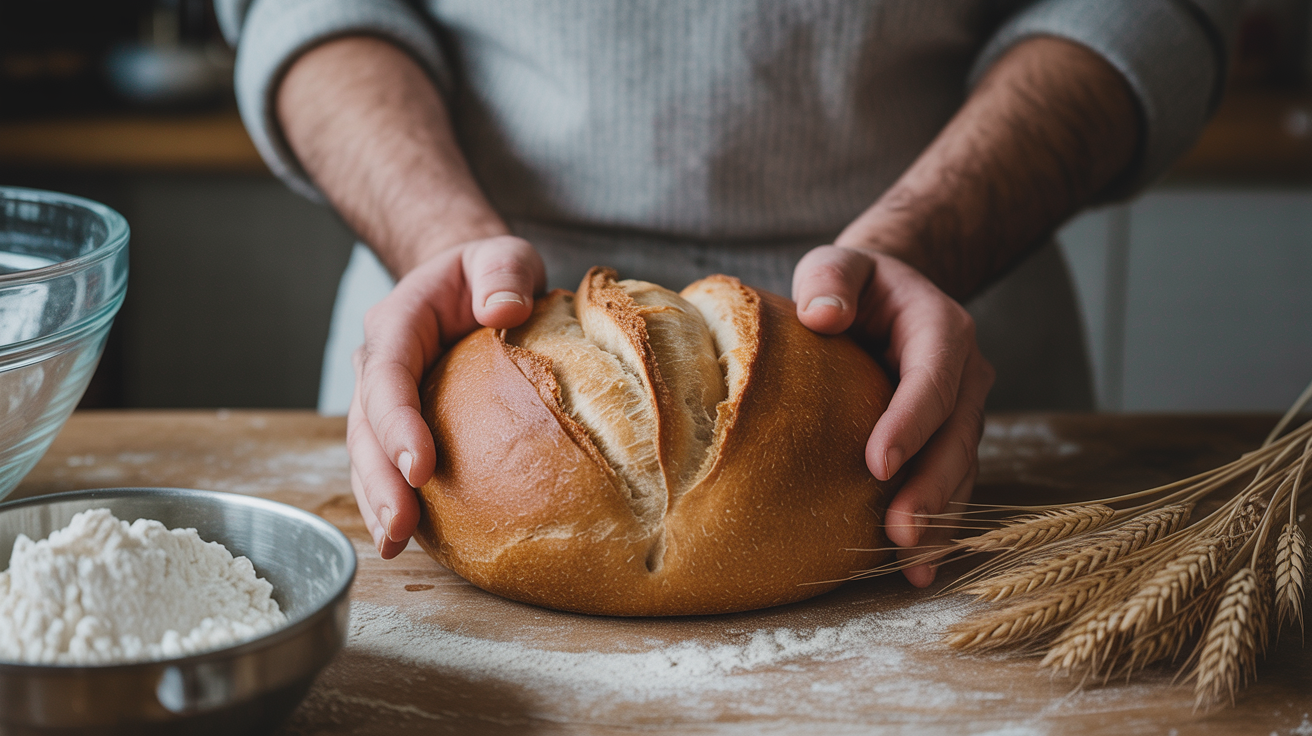
Something to Score the Dough
A sharp knife works. A razor blade works even better if you happen to have one. The goal is a quick, confident slash across the top of the loaf right before it goes into the oven. This controls where the bread opens up as it bakes. A dull knife drags the dough and deflates it, so sharpen yours or use the tip of a serrated bread knife.
Something to Cover the Dough While It Rises
Plastic wrap is fine. A clean kitchen towel is fine. A plate set on top of the bowl is fine. You're just keeping the surface of the dough from drying out. No specialty equipment needed.
Measuring Without a Scale
If you have a kitchen scale, use it. Grams are more accurate than cups, and the difference matters a little more when you're kneading by hand because the feel of the dough is your main guide.
If you don't have a scale, here's how to measure flour reliably with cups: use a spoon to scoop flour from the bag into your measuring cup until it's heaped, then sweep a straight edge (the back of a knife, a chopstick) across the top. This gives you a cup that weighs close to 120 grams. Packing flour directly from the bag with the cup itself compresses it and can add 20 to 30 grams per cup, which is enough to make your dough stiff and tough.
A Simple Hand-Kneaded Bread Recipe
This is a straightforward white loaf with no special steps. It uses a longer rise time in place of any mechanical mixing, which means the gluten develops more gently but just as fully.
| Ingredient | Cups | Grams |
|---|---|---|
| Bread flour (or all-purpose) | 3 cups | 360 g |
| Warm water (about 100°F / 38°C) | 1 cup + 2 tbsp | 270 g |
| Active dry yeast | 1 tsp | 3 g |
| Fine salt | 1¼ tsp | 7 g |
| Olive oil or neutral oil (optional) | 1 tbsp | 12 g |
Method:
- Combine the warm water and yeast in your bowl and let it sit for 5 minutes. It should look slightly foamy or cloudy. If nothing happens after 10 minutes, your yeast is likely old.
- Add the oil if using, then add the flour and salt. Mix with a fork or your hand until no dry flour remains. The dough will be shaggy and rough.
- Cover the bowl and let it rest for 10 to 15 minutes. This rest (called autolyse) lets the flour absorb the water fully and makes kneading much easier.
- Turn the dough out onto a lightly floured surface and knead for 8 to 10 minutes (see the next section for how).
- Shape the dough into a ball, return it to the bowl, cover, and let it rise at room temperature until roughly doubled. This takes 1 to 1.5 hours in a warm kitchen, or up to 2 hours if your kitchen is cool.
- Gently deflate the dough, shape it into a round or oval, and place it on a lightly oiled or parchment-lined sheet pan. Cover loosely and let it rise again for 45 minutes to 1 hour.
- Preheat your oven to 450°F (230°C) while the shaped dough finishes rising.
- Score the top with a sharp knife (one or two cuts, about ½ inch deep), then bake for 25 to 30 minutes until deep golden brown. Tap the bottom: a hollow sound means it's done.
- Cool on a wire rack for at least 30 minutes before cutting.
How to Knead Bread by Hand
Kneading develops gluten, which is the network of proteins that gives bread its structure and chew. You're essentially stretching and folding the dough repeatedly until it becomes smooth, elastic, and slightly tacky without being sticky.
Here's the basic motion: push the heel of your hand into the dough, away from you. Fold the far edge back toward you. Rotate the dough a quarter turn. Repeat. It's a push-fold-turn rhythm and it becomes automatic after the first minute.
A few things that help:
Don't flour the counter too much. A small amount of stickiness is normal and useful. If you keep adding flour every time the dough sticks, you'll end up with a dry loaf. Instead, use a bench scraper (or a wide spatula) to lift the dough off the surface when it sticks, and keep going.
Use your body weight. Kneading with just your arms tires you out fast. Lean into the dough with your upper body and let gravity do part of the work.
Know when to stop. Well-kneaded dough is smooth and feels a bit like an earlobe: soft, pliable, with a little give. If you stretch a small piece between your fingers and it forms a thin, translucent membrane without tearing (the "windowpane test"), you're done. If it tears immediately, knead another 2 minutes and test again.
Making bread without a mixer actually teaches you more about dough than any machine can, because you feel the dough change under your hands. It goes from rough and sticky to smooth and elastic in about 8 minutes, and that transition is hard to miss.
Baking on a Sheet Pan (No Loaf Pan Needed)
A free-form loaf baked directly on a sheet pan is sometimes called a hearth loaf. It spreads a little more than a pan loaf but develops a better crust because the hot air can circulate around the whole loaf.
To help the crust get crisp, try this: put a small oven-safe pan or dish on the bottom rack when you preheat. Just before you load the bread, pour a half cup of hot water into that pan. The steam it creates keeps the surface of the dough moist for the first 10 minutes of baking, which lets the bread expand fully before the crust sets. After that, remove the water pan so the oven dries out and the crust crisps up.
If you like the idea of a hands-off loaf that still has great crust, no-knead bread is worth trying alongside this recipe. It uses time instead of kneading and bakes in a covered pot.
Frequently Asked Questions
Can I use all-purpose flour instead of bread flour?
Yes. All-purpose flour has slightly less protein than bread flour, so the dough will be a little softer and less chewy, but it makes a perfectly good loaf. The recipe above works with either.
My dough is sticking to everything. What do I do?
A slightly tacky dough is normal. If it's sticking aggressively to your hands and the counter, your dough might have too much water, or you may need to knead it longer. Add flour one tablespoon at a time, kneading it in fully before adding more. Don't add more than 2 or 3 tablespoons extra or you'll make the dough too stiff.
How do I know if my bread is done?
The crust should be deep golden brown, not pale. Tap the bottom of the loaf: a hollow sound means the interior is baked through. If you have an instant-read thermometer, the center should read 195 to 210°F (90 to 99°C). Don't cut into it right away; the crumb needs 20 to 30 minutes to set after it comes out of the oven.
What if my dough doesn't rise?
The most common cause is old or dead yeast. Test it by dissolving a teaspoon in warm water with a pinch of sugar: if it doesn't foam in 10 minutes, replace it. The second common cause is water that's too hot. Water above 120°F (49°C) kills yeast. Aim for water that feels warm but not hot on your wrist.
Do I need to understand what each ingredient does?
It helps. Knowing why you're adding salt and what the yeast is actually doing makes troubleshooting much easier. If you want to go deeper, the four ingredients in real bread breaks down exactly what flour, water, yeast, and salt each contribute to the loaf.