Getting Started
No-Knead Bread: The Easiest Loaf to Start With
No-knead bread uses time instead of effort to build gluten. Mix four ingredients, rest overnight, bake in a Dutch oven. Here's exactly how.
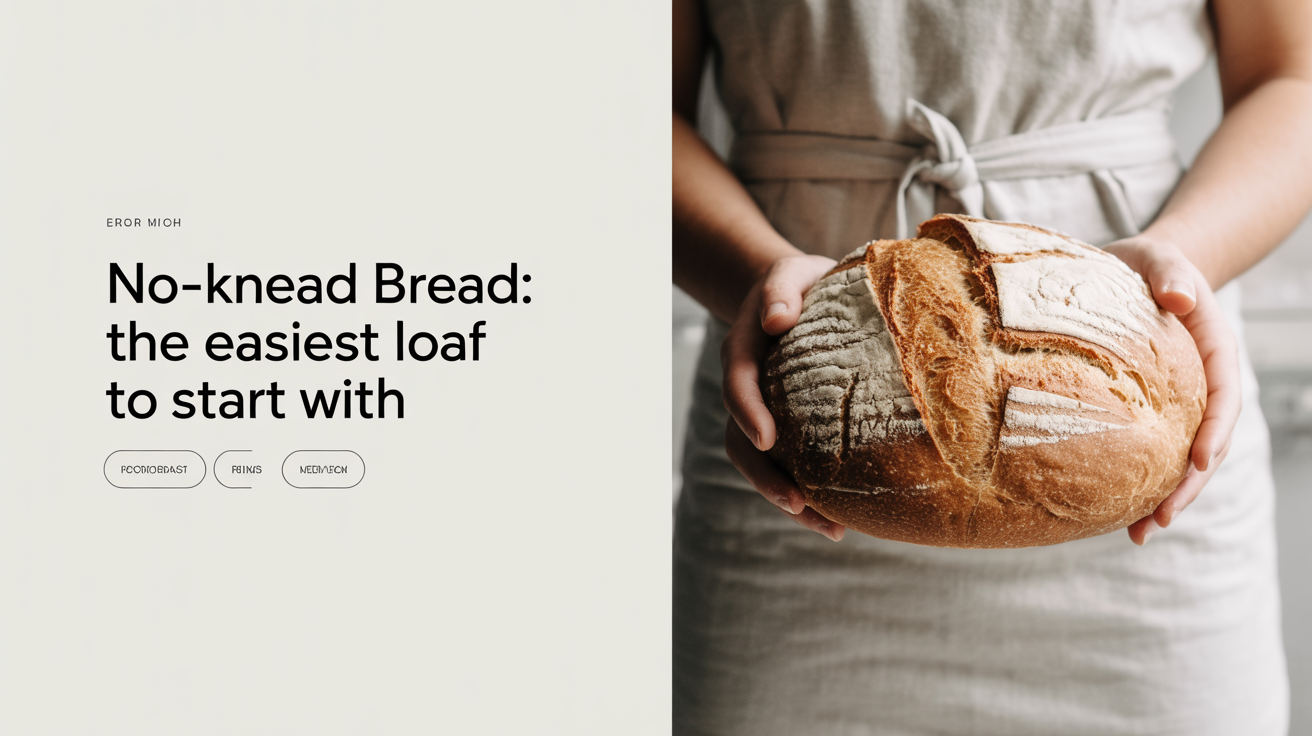
If you have never baked bread before, no-knead bread is the place to start. You mix four ingredients in a bowl, leave them alone for most of a day, and bake the dough in a covered pot. No stand mixer, no special technique, no ten years of experience required. The result is a loaf with a crackly crust and an open, chewy crumb that looks like it came from a bakery.
The secret is simple: time does the work that kneading normally does. A long, slow rise lets the gluten develop on its own, so your hands barely need to touch the dough.
Why No-Knead Bread Actually Works
Kneading aligns and strengthens the gluten strands in dough. Those strands trap the gas that yeast produces, which is what makes bread rise and gives it structure. Kneading is one way to build gluten, but it is not the only way.
Gluten also forms on its own when flour and water sit together. Enzymes in the flour break down proteins, those proteins bond into gluten chains, and over 12 to 18 hours you end up with a dough that is just as developed as one you spent ten minutes working by hand. You get all the structure, none of the effort.
The other reason this method works so well for beginners is the dough itself. It is very wet, with about 75% water relative to the flour weight. Wet dough bakes up with a more open crumb and a better crust than a stiffer dough. The tradeoff is that it sticks to everything, but a short rest before baking tightens it up enough to handle.
If you want to understand what each ingredient is doing beneath the surface, read what flour, water, salt, and yeast each contribute to a loaf. It makes the whole process less mysterious.
The Recipe
This is a reliable no-knead bread recipe that makes one round loaf, enough to serve four to six people.
Ingredients
| Ingredient | Grams | Volume (approximate) |
|---|---|---|
| Bread flour | 400 g | 3 cups + 2 tbsp |
| Water (room temp) | 300 g | 1 cup + 5 tbsp |
| Fine salt | 6 g | 1 tsp |
| Instant yeast | 1 g | ¼ tsp |
Bread flour gives you more gluten than all-purpose, which helps with the texture. You can use all-purpose flour if that is what you have; the loaf will still be good, just a little less chewy.
Method
- Combine the flour, salt, and yeast in a large bowl and stir them together briefly.
- Pour in the water and mix with a fork or your hand until no dry flour remains. The dough will look rough and shaggy. That is exactly right.
- Cover the bowl tightly with plastic wrap or a damp towel.
- Leave it at room temperature for 12 to 18 hours.
That is the entire mixing process. It takes about five minutes.
The Overnight Rise
The long rest is where the bread actually happens. Set the dough to rise before you go to bed and it will be ready to bake the next morning. Or mix it in the morning and bake that evening.
What you are looking for after the rise: the dough should have roughly doubled in size and its surface should be covered in bubbles. Those bubbles are carbon dioxide from the yeast, proof that fermentation has been doing its job. If the dough looks flat and has no bubbles, your yeast was likely old. Check the expiration date and start again with a fresh packet.
Temperature affects the rise time. A warm kitchen (around 75-80°F) pushes toward the 12-hour end. A cool kitchen (65-68°F) will need closer to 18 hours. If your kitchen is very cold, you can add a few extra hours without any problem. The dough is forgiving.
One important note: use very little yeast. The quarter teaspoon in this recipe seems like nothing, but more yeast in a long fermentation leads to an over-risen, deflated dough. The small amount ferments slowly and steadily, which also develops better flavor in the finished bread.
Shaping the Dough
Wet dough is sticky. The trick is to avoid adding flour and to work quickly.
Flour your work surface generously. Turn the dough out of the bowl and use a bench scraper or your fingertips to fold it over itself a few times, pulling the edges into the center. Flip it seam-side down. You are not trying to knead it; you just want to build a little surface tension so the loaf holds its shape.
Drop the shaped dough seam-side up into a bowl lined with a floured kitchen towel (a proofing basket works too, but a regular bowl is fine). Dust the top with flour, cover it loosely, and let it rest for 30 to 45 minutes while the oven heats up. This short rest, called the final proof, relaxes the dough and gives it one last boost before baking.
For more detail on handling dough without any specialized tools, making bread by hand without special equipment covers exactly that.
Baking in a Dutch Oven
The Dutch oven is what makes this recipe produce bakery-quality results at home. Here is why it matters.
Professional bread ovens inject steam during the first phase of baking. Steam keeps the crust soft long enough for the loaf to expand fully before setting. Without steam, the crust hardens too early and the bread cannot rise properly. A covered Dutch oven traps the steam that comes off the dough itself, replicating what those commercial ovens do.
How to Bake
- Place your Dutch oven (with its lid on) in the oven and preheat to 475°F for at least 45 minutes. The pot needs to be very hot.
- Cut a piece of parchment paper large enough to line the pot with some overhang on the sides. Lay it out on the counter.
- Turn the proofed dough out of the bowl onto the parchment, seam-side down. Score the top with a sharp knife or bread lame: one straight cut or an X, about half an inch deep.
- Lift the dough by the parchment edges and carefully lower it into the hot pot.
- Cover and bake for 20 minutes.
- Remove the lid and bake for another 20 to 25 minutes until the crust is deep brown.
- Lift the loaf out using the parchment and cool it on a wire rack for at least one hour before cutting.
The scoring allows the bread to expand in a controlled way as it bakes. Without it, the loaf may split randomly along the sides.
The internal temperature when fully baked is around 200-210°F, if you want to check with a thermometer.
If You Do Not Have a Dutch Oven
A Dutch oven is the easiest tool for this, but not the only option. You can bake the dough on a sheet pan and place a large roasting pan or stainless steel bowl over it for the first 20 minutes to trap steam. It takes a bit more setup but it works. Avoid glass bowls in a 475°F oven.
Frequently Asked Questions
Can I use active dry yeast instead of instant yeast?
Yes. Dissolve the active dry yeast in a tablespoon of the water from the recipe and let it sit for five minutes before mixing everything together. The rise time may be slightly longer, but the result is the same.
Why is my bread dense and heavy?
The most common cause is underfermentation: the dough did not rise long enough or the yeast was not active. Look for that bubbly, doubled dough before you shape it. If the yeast is fresh and the kitchen is warm, 12 to 18 hours should be enough. Dense bread can also come from cutting into the loaf too soon; the interior is still cooking as the bread cools.
Can I add anything to the dough?
Yes. Fold in additions after the overnight rise, during the shaping step. Rosemary, olives, roasted garlic, walnuts, and grated cheese all work well. Stick to about a half cup of additions per loaf and make sure wet ingredients like olives are dried off so they do not add extra moisture.
Does the dough have to rise overnight?
It needs at least 12 hours to develop properly. You can push to 18 or even 24 hours at room temperature without much risk. If you need more flexibility, refrigerate the dough after mixing. Cold fermentation can go up to 48 hours and typically improves the flavor. Pull it from the fridge, let it sit at room temperature for an hour, then shape and bake.
My crust went soft after cooling. What happened?
A soft crust usually means the bread did not cool in open air. Leave it on a wire rack so air can circulate underneath. Cooling on a solid surface traps steam on the bottom, which softens everything. Once the loaf is fully cooled, storing it cut-side down on a cutting board (with no bag) keeps the crust reasonably crisp for a day.
Once you have made this a couple of times, you will want to experiment. A small amount of whole wheat flour in place of some of the bread flour adds flavor. A longer, colder fermentation adds tang. The foundation stays the same: mix, rest, shape, bake hot.
For a broader look at how the whole process fits together from your very first attempt, a complete beginner's guide to baking your first loaf covers what to expect start to finish.